Replacing the Evaporator on Whirlpool or KitchenAid Stand Alone Ice Machines
By Brian Christal
November, 2008
Reviewed and edited by Richard Kinch
Symptoms of an evaporator leak are
typical of any refrigerant leak, that is, the ice machine runs through all of the
cycles normally, however, it just isn't getting cold enough to make ice.
Lubricant residue in the bin is a definite leak symptom.
Technicians may tell you that
you need to replace your compressor and evaporator at the same time. While this
may not be bad advice, it will result of a repair bill in excess of $800. If you
have access to a brazing torch and good mechanical skills, you can replace
the evaporator yourself for about $120.
When the evaporator fails, it typically develops a slow leak where its bonded to the
freeze plate. It's pretty easy to diagnose using soapy water assuming
there's still some refrigerant left in the system.
Diagnosing
- Pull the ice machine out in the open.
- Remove the cutting grid front cover.
- Remove the door and the top hinge.
- Unplug the cutting grid, bin thermistor, and evaporator thermistor.
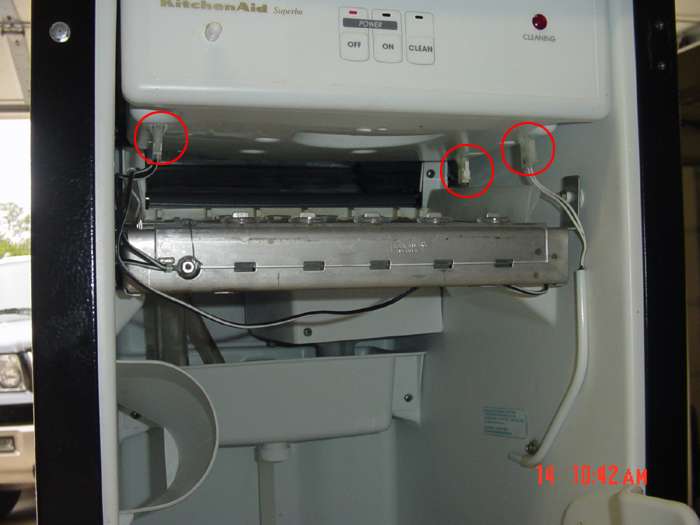
- Remove the four screws (two front, two back) holding the top panel of
the ice machine.
- Lift the top panel off. It will still have a wiring harness
attached, so you will need to have a chair or something close by to lay it
on.
- See the lines on the freeze plate? That's where the evaporator is
bonded to the back. Leaks can develop on them. Spray them with
soapy water and look for bubbles.
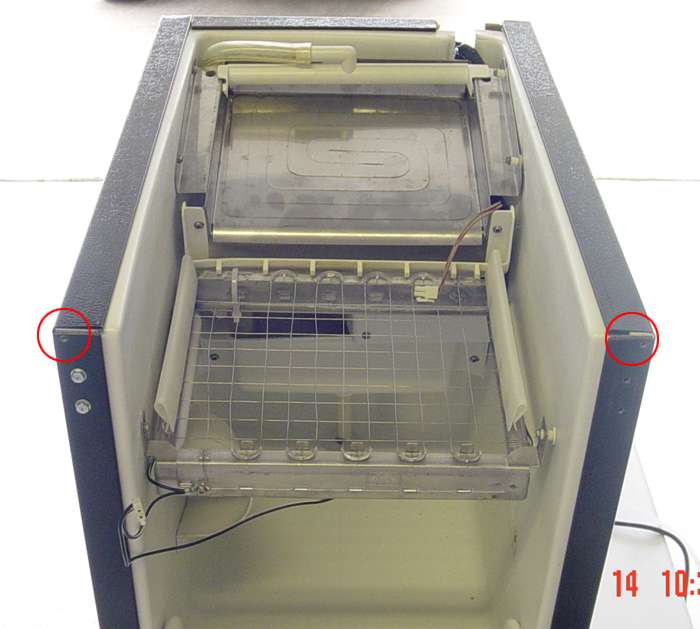
Removing the evaporator
- Remove the cutting grid.
- Remove the catch pan from the front of the evaporator.
- Remove the four screws holding the evaporator.
- Working on the back - remove the six screw holding wire harness cover.
Remove the two screws on the bottom and two more on the front that hold the
ice machine bin to the base plate. Unplug the wire harness connectors
and lay the top on your work area. There will still be other wires
connected to the top, so you'll have to keep the top nearby.
- At this point you can lift the evaporator out of the bin. The
copper tubing is just flexible enough to let you pull it out and back.
When your finished, your machine should look like the picture above.
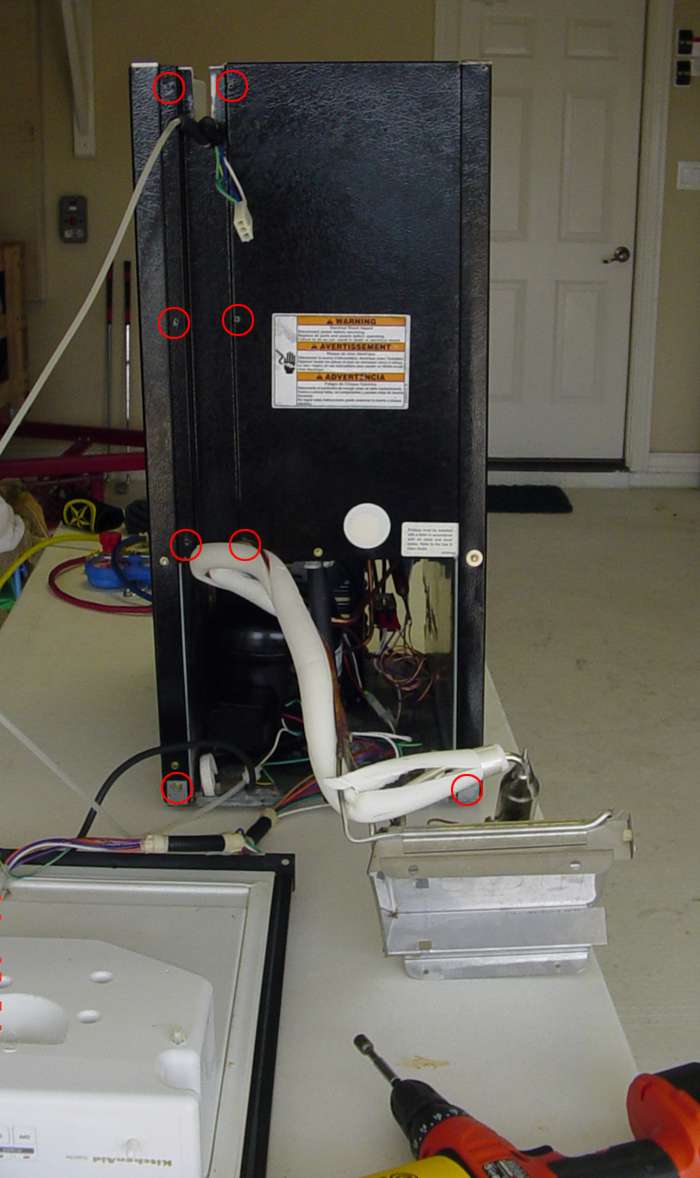
- Disconnect the clear water tube from the water valve.
- Lift the entire bin up and away from the base plate. Your machine
should look like the one below.
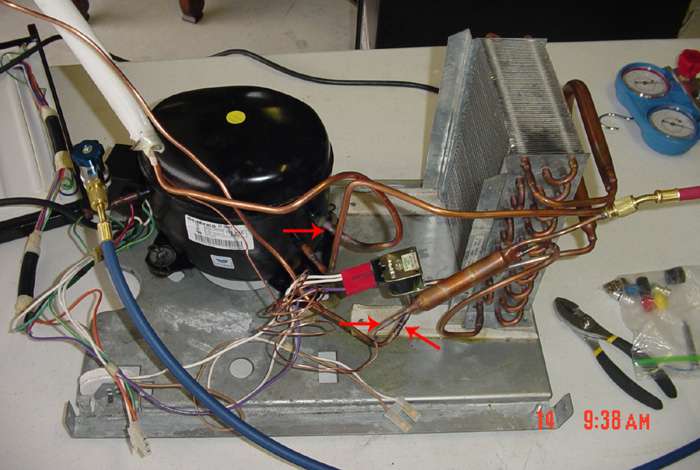
- Remove the fan.
- Heat the three spots shown with the arrows and remove the tubes.
Remove the evaporator.
Assembly tips
- You should install a charging port as part of the evaporator replacement,
since the system will only have a pinched-off process tube stub from the factory.
I had my compressor replaced while it was under warranty, and the technician
added a charging port then. You will probably have to add your own. The low side
is on the back of the compressor, the high side is on the drier. A port at
either position will suffice. The repair manual states
you should charge through the high side, although if you are careful to insert only
gas and not liquid, the low side is easier to use.
- The new evaporator comes with its tubing ends swaged, ready to braze into the
old system if you cut the old evaporator out carefully.
- The thin capillary tube between the drier and evaporator carries the compressed
refrigerant to the evaporator. Take care not to clog it with your brazing process.
- The drier should not need replacement unless it has been exposed to the
atmosphere for more than a brief time.
- I used an inexpensive
venturi vacuum gadget from Harbor Freight, as well as their
manifold gauge set.
Vacuuming and "rinsing" with gas refrigerant a few times via the gauge manifold will remove all
condensible gases from the system just as well as a very expensive vacuum pump, at the small cost of
a bit of refrigerant.
- Be sure to plug your bin thermistor back in. The clean light will
just flash and the machine won't work if you don't.
- Weigh in 6.5 oz of refrigerant to the system, or whatever amount the appliance label indicates.
If you're not equipped with a proper scale, you can get by with charging half of a 12-ounce automotive
can of refrigerant, estimating half of the contents by shaking the can in your hand as it charges.
Take care to charge only gas if you're using a low-side charging port, because a slug of liquid
entering there could damage the compressor.
Have a comment or question about my ice machine repairs?
Email me at:
kinch@truetex.com
Richard J. Kinch
Back to Ice machine main page
Back to Home page